Sale Ends & Price Increases In...

Sale Ends In...
Attention: Landscape Photographers, Travel Enthusiasts, and Digital Artists...
Finally, An Easy Way to Edit Your Landscape Photos into Art, in 10 Minutes or Less
(Without Cliché Editing or Sloppy Compositions)

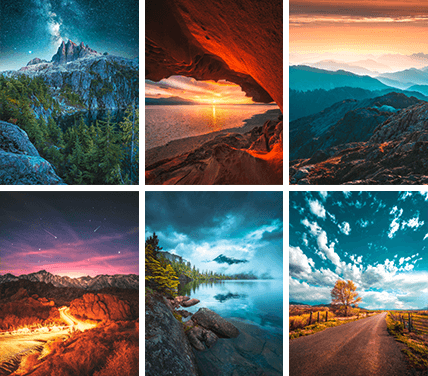
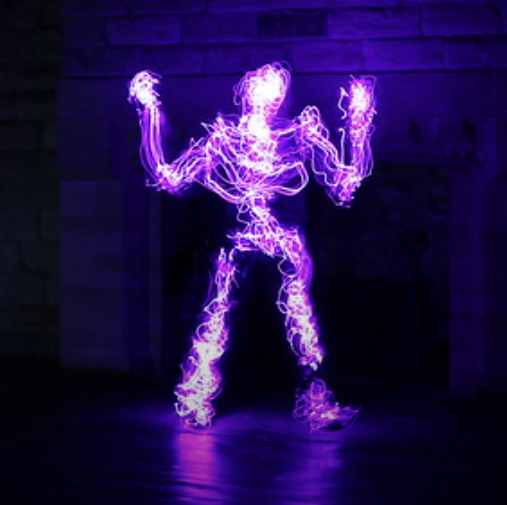
"Your presentation style and easy step by step guide have enabled me to start to use the power of lightroom - especially on those old photos with bland skies and detail hidden in the shadows. I wish I had found your course earlier!"
Phil Mccalvey

If there was a simple way to edit your landscape photos in Lightroom so quickly and so beautifully that your friends begged you for prints… would you be interested?
What if you knew the most efficient way to breath new life into your old photos in minutes, not hours… would you find the task less daunting?
Here’s something few people know… You can edit your photos in Lightroom, 10x better than you can imagine now, just by following a simple process.
Pictures so striking and vibrant that others might accuse you of outsourcing your processing to a professional. You don’t need a PhD in computer science, and you don’t need expensive training.
All you need is the right approach.
Take a look at these photos:
99% Positive reviews
1,029 students

36 Tutorials (5.5 hours of video content)
4 FREE bonuses
Online & at your own pace
Downloadable onto any device
Language: English
Level: Beginner
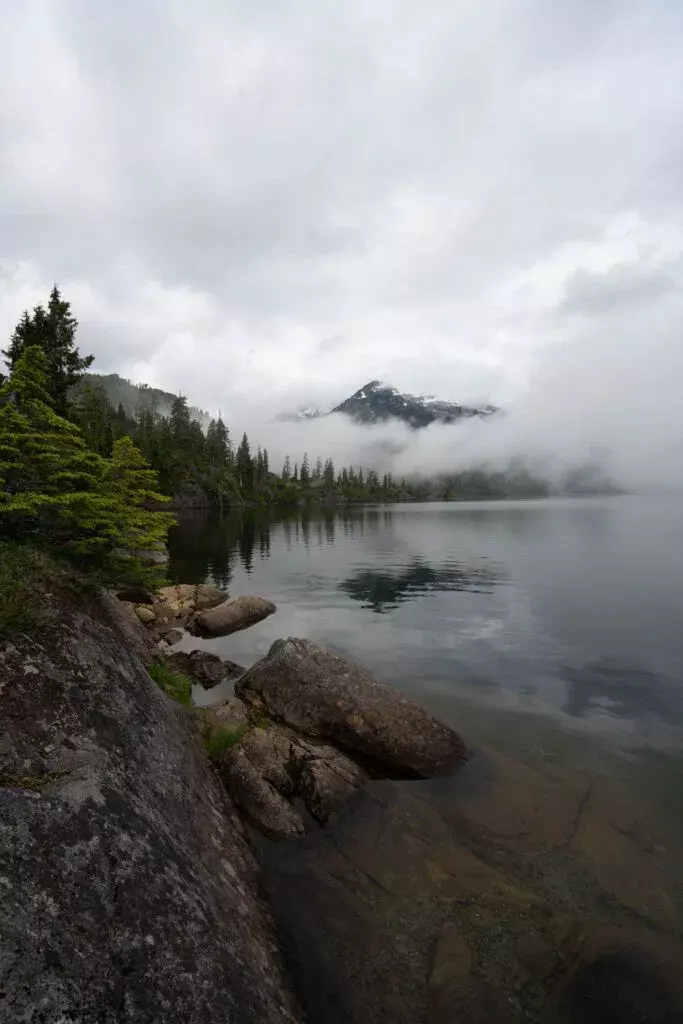
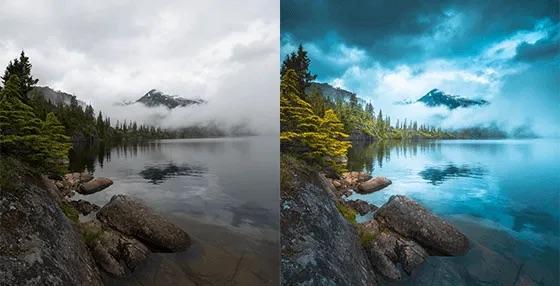
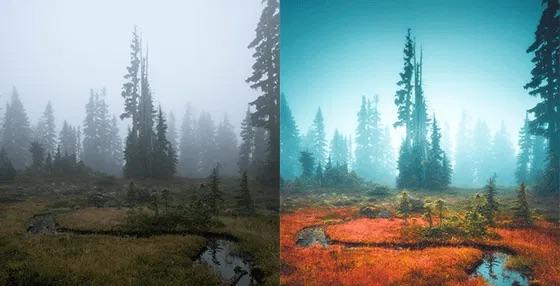
This image was taken on a misty morning but was left unedited…
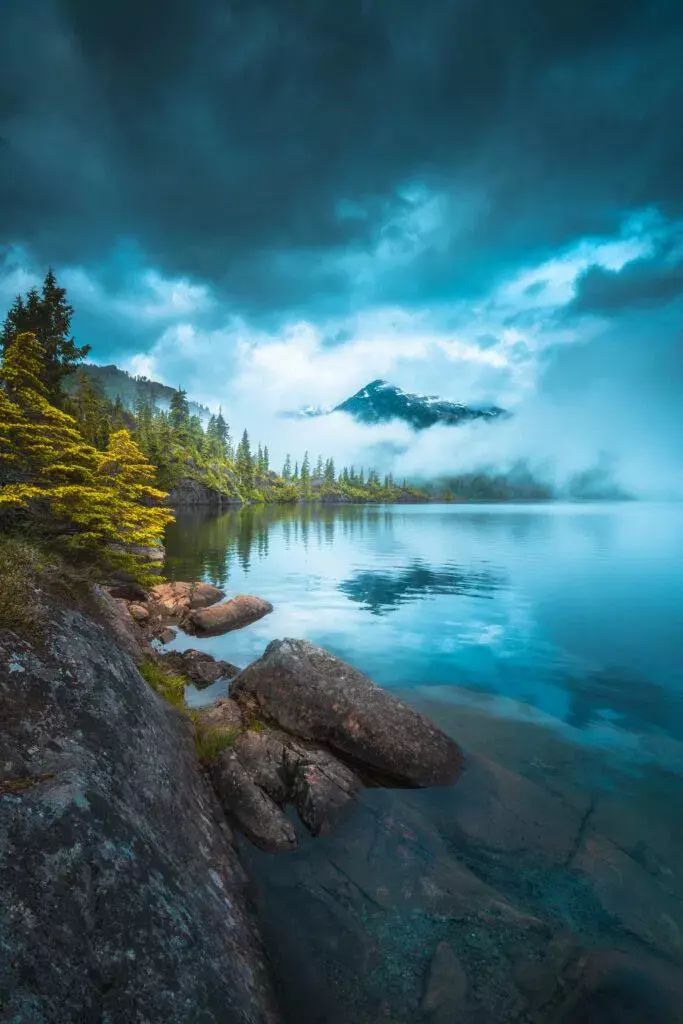
This is the exact same photo after some quick editing steps.
This transformation was done by my friend, Zach Doehler. He’s a Canadian landscape photographer, with 8 years of experience.
I love his style because he can enhance any bland scene, turning it into stunning landscape art.
All he needs is some sliders in Lightroom… bold colors… and a few finishing touches in Photoshop.
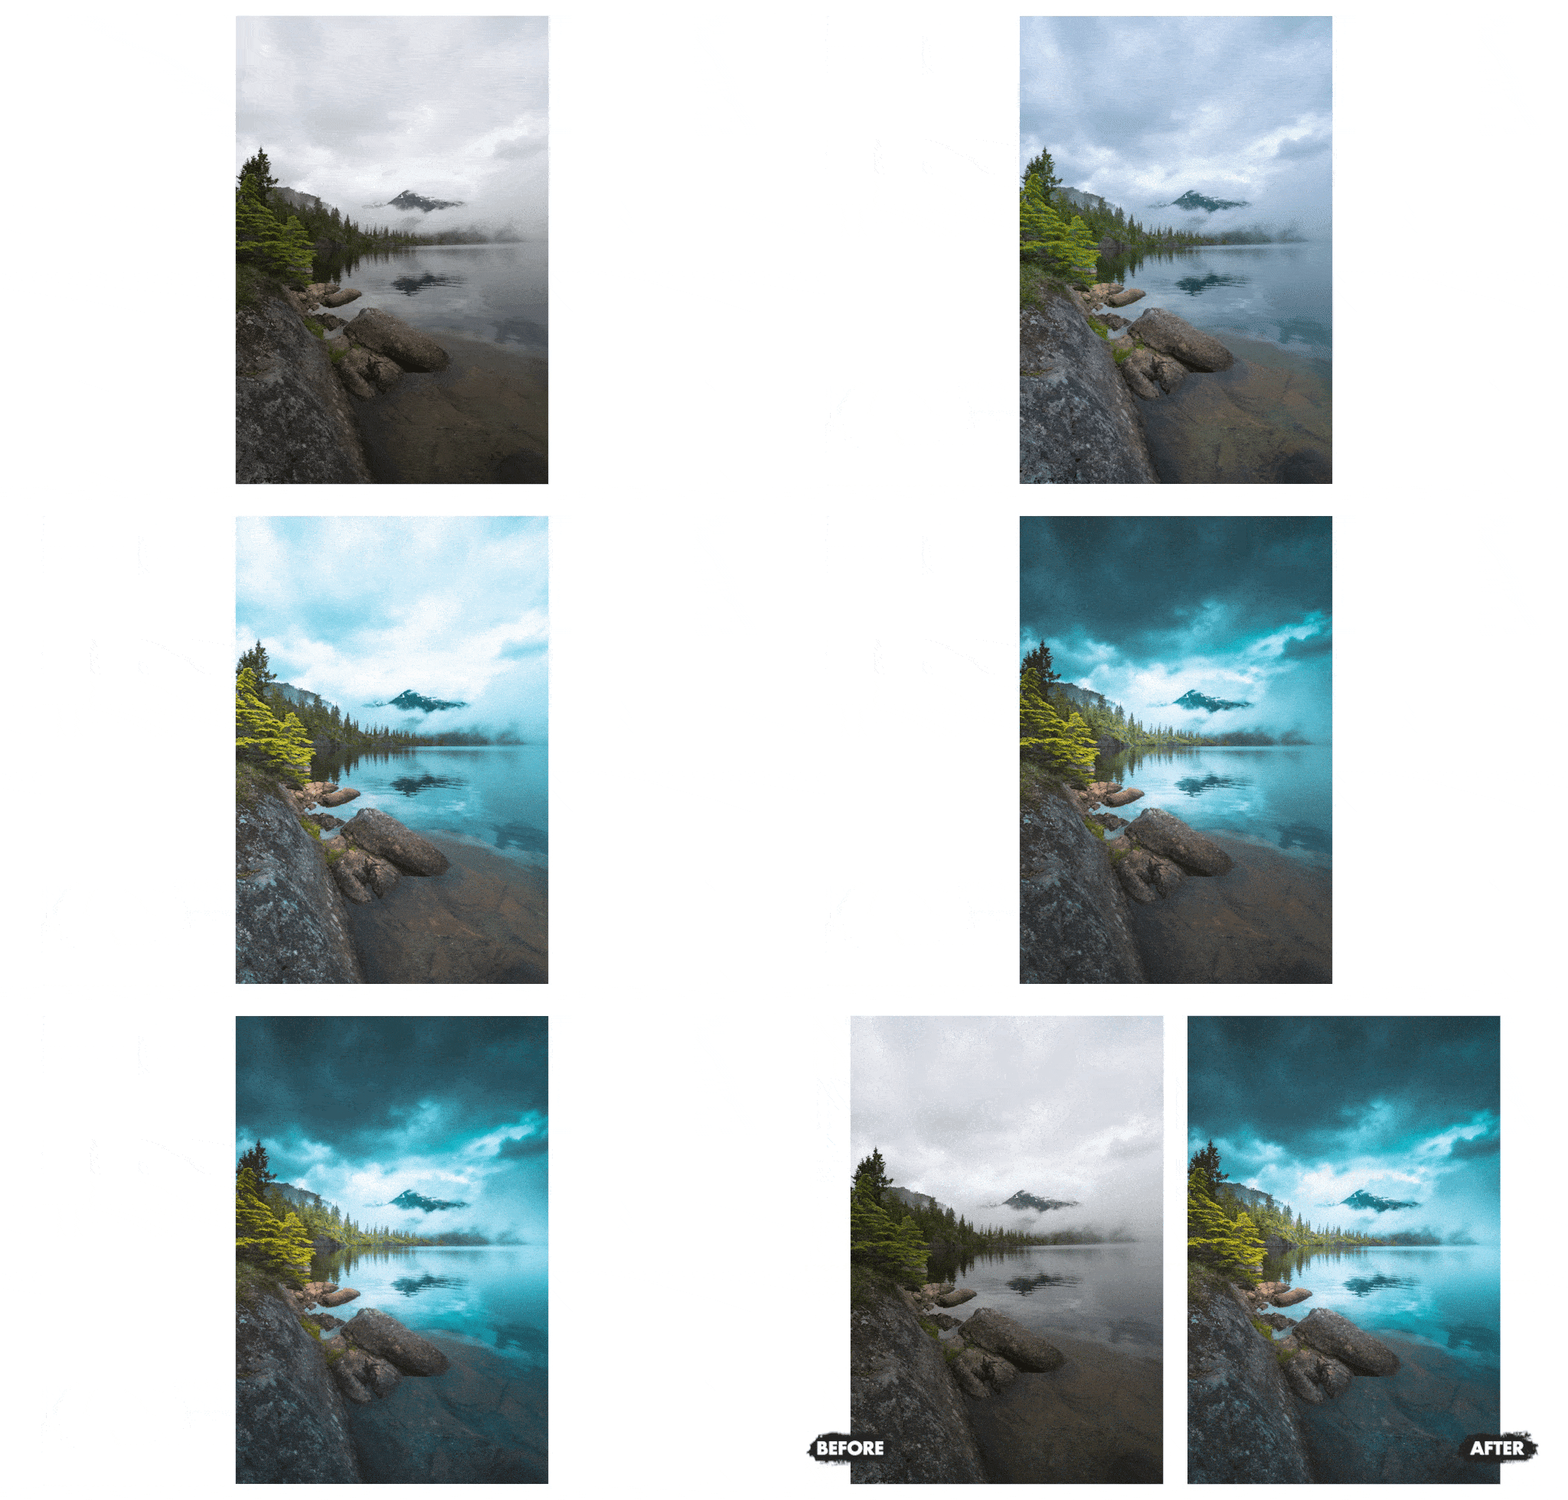
When I asked Zach how it was done, he was more than happy to share his “secret sauce”…
Meet Zach Doehler, A World-Class Landscape Photographer

@calibreus
157K Followers
Zach captures vibrant sunsets by tranquil lakes… moody images of foggy forests… mesmerizing starry skies over rocky mountains…
His style relies on revealing the hidden beauty of landscape photos from his RAW files with simple editing steps.
(No matter how underwhelming the image might look in the first place.)
I tried it myself, and I managed to bring out details from my images that I didn’t realize were even there.
It’s no wonder he has 157,000+ followers on Instagram and a successful business selling prints online.
He pioneered a unique style of photography that thousands of photographers are aiming to achieve.
So it only made sense to join forces and create this…
This 5.5-hour video course shows you how to transform your landscape photos into mesmerizing works of art.
Zach uses a number of different editing techniques. These range from simple compositional tricks… to the adjustment brushes and graduated filters and more…
And the best part of Zach’s process is that it works on all of your old photos too.
All you need is this video course and its powerful bonuses (more on those below).
With “Epic Landscape Editing”, you’ll soon discover:
-
Easy ways to breath new life into all of your old landscape photos
-
Unique techniques to find and highlight the beautiful details hidden in your RAW files
-
Step-by-step editing walkthroughs to transform your landscape photos into mesmerizing scenes
-
Two techniques to replace a dull sky in Photoshop
-
How to develop a colorful and unique atmosphere using the Calibration and HSL panels in Lightroom
-
An easy way to create a dreamy effect by developing the light source in Lightroom
-
The compositional tips and tricks a professional landscape photographer uses to capture dramatic scenes
Zach covers the editing process for nine of his most viral images. Each of them is broken down into several bite-sized videos averaging seven minutes in length.
This includes inspiration behind the photo… tweaks using the Develop tab in Lightroom… color & image transformation… and final touches in Photoshop.
This gives you a complete overview of the master techniques of a professional landscape photographer and digital artist.
And to make the process even simpler, Zach has provided the RAW files of the images in the course. So you can follow along and practice using his exact shots.
Breathe New Life Into Your Landscapes
Have you ever come home from a landscape shoot disappointed?
Perhaps the sunset wasn’t as striking as you’d hoped… or the weather had changed just before you arrived.
As a landscape photographer, I totally understand these frustrations…
But the great thing about Zach’s approach is that you can still turn those “disappointing” photos around… elevating them to the type of photo you were trying to capture in the first place.
In the final project, he even covers how to replace the sky in Photoshop using two different techniques.


Edit Your Landscape Photos Into Stunning Works of Art Within Minutes
Picture this.
You’ve mastered a range of new Lightroom techniques that will allow you to enhance your landscape images.
Execution isn’t a problem, because you clearly understand the logic behind each editing decision.
You excitedly open up Lightroom and find a landscape image that didn’t initially meet your expectations.
Within a few minutes of editing the RAW file, you have uncovered some of the beautiful details hidden inside the image.
Five minutes later you’ve transformed your landscape photo into a work of art.
It’s more vibrant, colorful, clear, and eye-catching…
The only thing left is to add some finishing touches, and watch it go viral on social media.


Zach is no stranger to teaching his style of photography. His tutorials have produced hundreds of happy students with stunning photos. Here are a few of them…
"Wow! You've lit a fire of inspiration under me..."

Phil Mccalvey
Your presentation style and easy step by step guide have enabled me to start to use the power of lightroom - especially on those old photos with bland skies and detail hidden in the shadows. I wish I had found your course earlier!
Zach, I just finished downloading all your presets and watching all of your training videos. All I can say is, thank you! Thank you for giving people a glimpse into your expertise when it comes to photo composition, equipment, and (most importantly) editing. Wow! You've lit a fire of inspiration under me, and all I can think about is getting back outside to snap more photos so I can keep learning and applying your take aways from the training videos. Thank you, again!

Nikki Hill
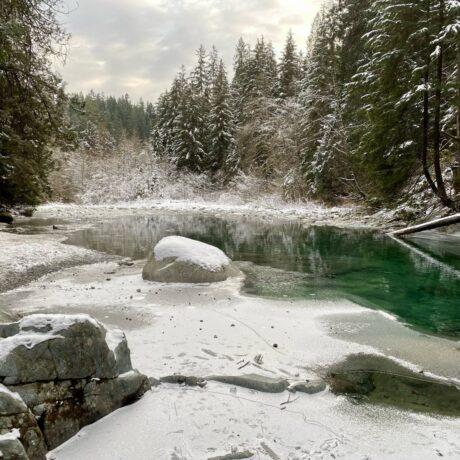
Evan
This course has been tremendous. From learning settings for different situations, to Lightroom and editing techniques, to the great community and material. And above all developing a bold, colorful artistic vision, it’s given me much more confidence in the journey from a shoot to a finished product. Thanks so much again!
Real People. Real Results.
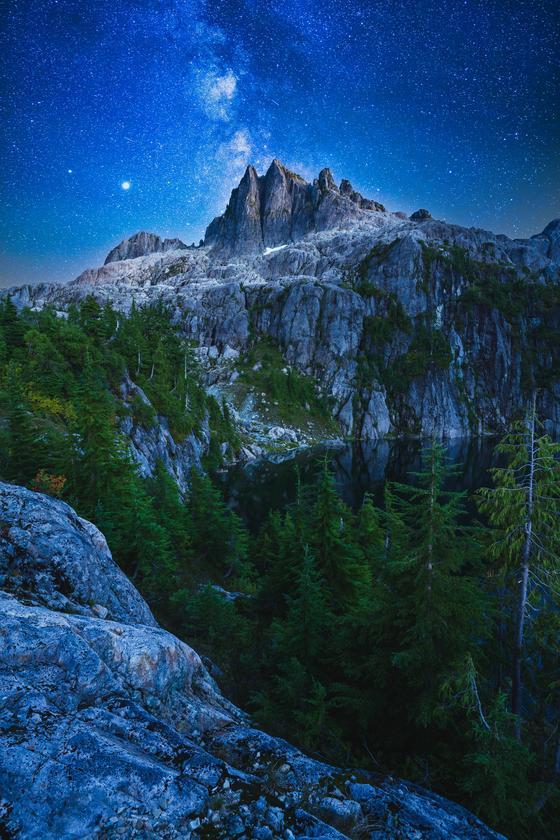
Robert Henderson
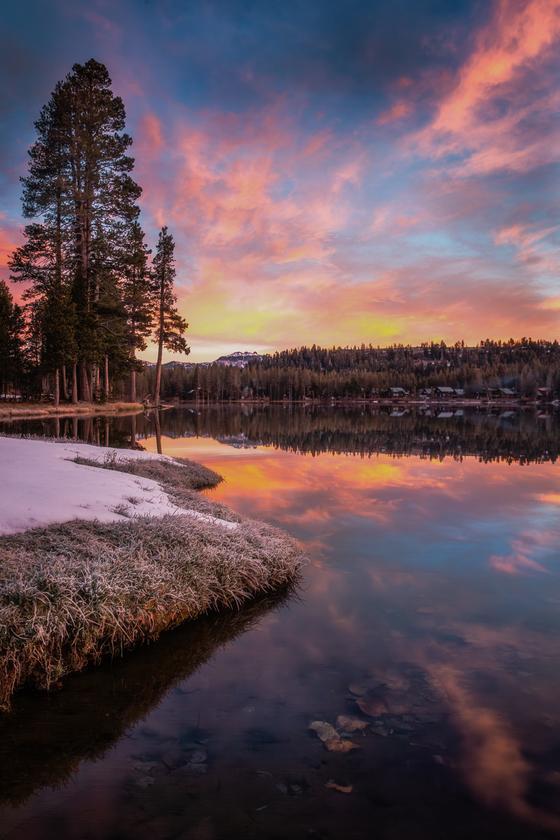
Nikki Hill
David Powell
Robert Henderson
Course Breakdown: 9 Projects for Eye-Catching Landscape Edits (Value $1,440.00)
Project 1 – Cloudy Conditions
In order to create a dark and moody image, Zach uses the Linear Gradient tool that allows him to bring down the exposure, giving the sky a stormy look.
And by using an Adjustment Brush, he brings more focus to the center of the image.
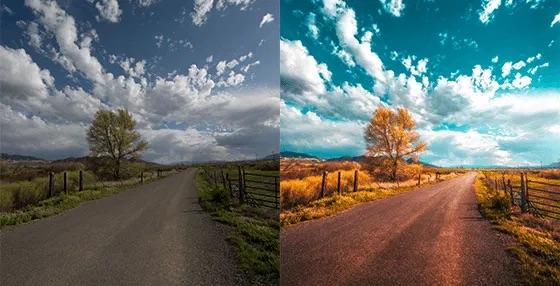
Project 2 – Sunny Skies
To draw the viewer’s attention to the focal point of the image, Zach tweaks the HSL sliders by adjusting the hue and saturation of the blues in the sky.
Then uses a Radial Filter to create a light source in the image.
Project 3 – Foggy Conditions
Zach brings out the colors of the alpine meadow in the foreground by tweaking the HSL panel.
And creates a dreamy look in Photoshop by adding an Orton effect.
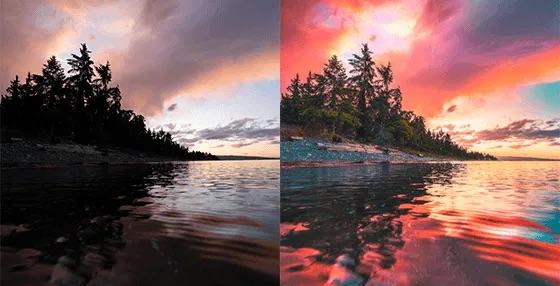
Project 4 – Sunrise & Sunset
Zach uses the Masking tools to bring out the colors of the sky, and mimic the same colors in the water. All this, while maintaining the focus on the sky.
Then he removes unwanted details from the foreground by using the Spot Healing Brush tool in Photoshop.
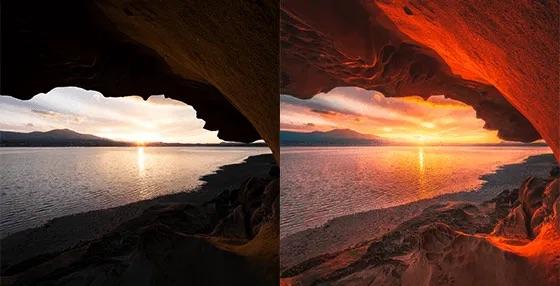
Project 5 – Golden Hour
Zach blends 3 images creating the perfect HDR to prepare his photo for editing.
And gets rid of the harsh edge of the lens flare to make it more natural in Photoshop.
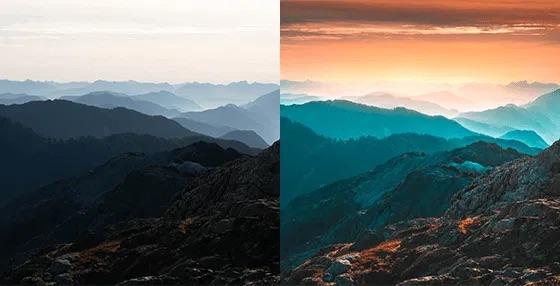
Project 6 – Layered Landscapes
By reducing the highlights in the sky, and using the Color Grading tool, Zach brings out the warmer tones of the image.
Using the Detail panel and adjusting the Masking slider he’s able to bring out the finer details of the mountains.
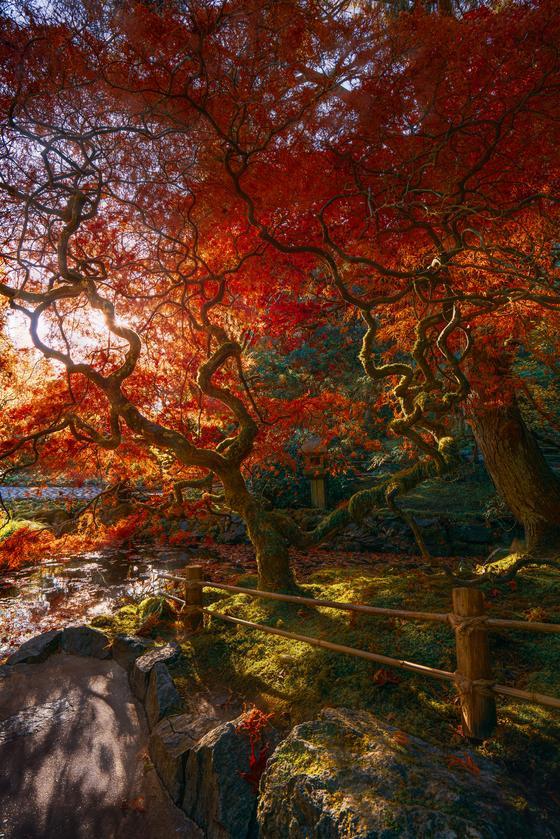
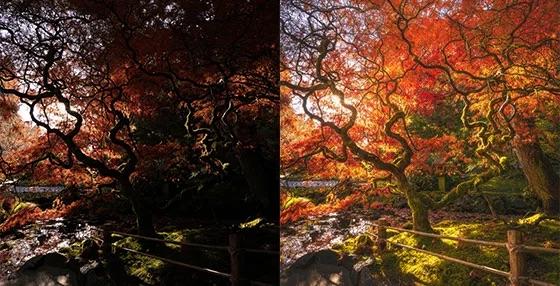
Project 7 – Fall Fairytales
Zach uses Lightroom’s full range of capabilities to make the colors stand out.
Contrasting the shape and structure of this majestic tree.
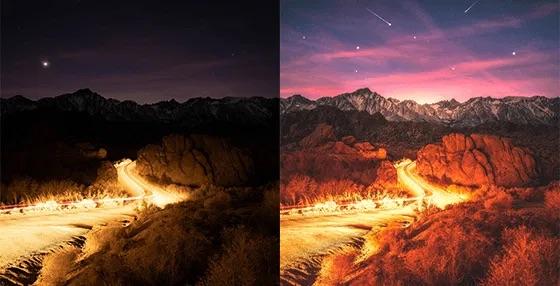
Project 8 – Long Exposure Photography
Zach brings out the details of the mountains in the background by adjusting the whites and shadows in the Basic Panel.
Then he adds texture to the night sky by brightening and enlarging a few stars using the masking tools.
And finally, he adds shooting stars by erasing traces of a straight white line.
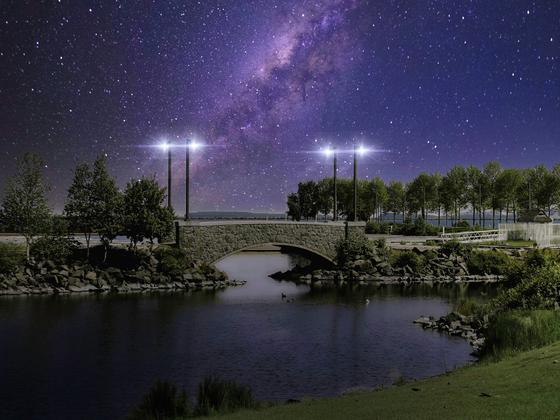
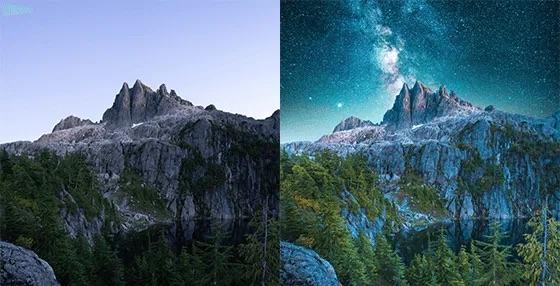
Project 9 – Milky Way Blends
Zach walks you through two different ways to replace the sky in the image. First, he covers the old way, by using the Quick Selection Tool in Photoshop. Then shows you the new Sky Replacement Tool too.
Finally, using the Color Range tool he creates a light source that he places between the background and the foreground layers to give the image a natural glow.
What else is included?
New Bonus: 60-Min Lightroom Starter Course (Value $199)
If you’ve never used Lightroom before, the idea can be quite daunting.
The good news is, that it’s fairly intuitive to use. And Zach has created a 60-minute course that covers the nine most important sections of the software:
-
Basic Panel, Tone Curve, HSL
-
Color Grading, Detail & Lens Correction, Transform & Effects, Export
-
Calibration & Cropping, Masking Tools, Range Mask
If you’re just starting with Lightroom, this is everything you need to get up to speed today.

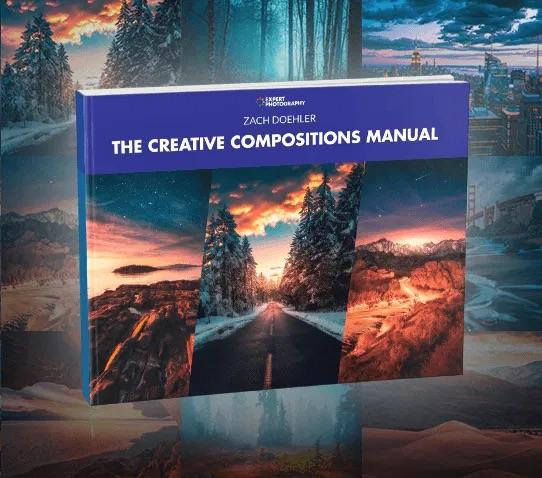
Bonus #1: The Creative Compositions Manual (Value $99)
If you understand composition, you can capture stunning images even in ordinary situations.
And if you’re just starting out, stepping in the shoes of an experienced photographer can provide a lot of insights.
That’s why Zach collected 15 of his best shots in this bonus chapter.
He’ll walk you through his inspiration behind each photo… and then break down the composition and main edits made to them.
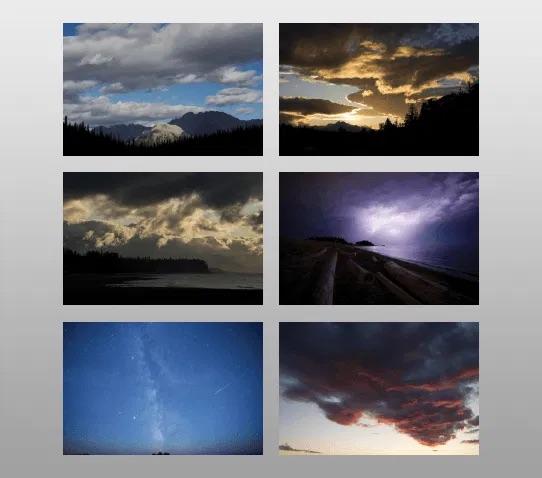
Bonus #2: Sky Replacement Gallery (Value $99)
Sometimes you go out for a photoshoot but come back with uninspiring results.
The sun didn’t shine while you were outside… the stars were hidden behind clouds… or you were hoping for a more dramatic sky.
With our sky gallery bonus, you’ll get your hands on 6 royalty-free images of the sky for your own personal use.
And throughout the course, you’ll learn how you can blend images together if you want to incorporate any of these skies in your final photo.
Bonus #3: Lightroom Presets for Landscapes (Value $99)
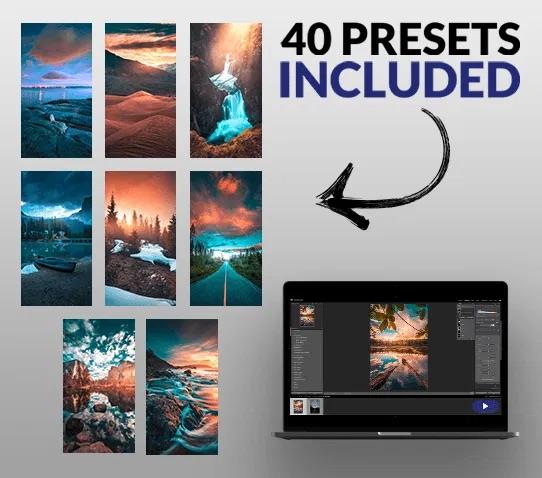
Once you’re up to speed on landscape editing, you’ll probably want to use presets to apply your most common adjustments.
That’s what Zach does. And I’m pleased to say he’s willing to share his presets with you.
You can follow his techniques step-by-step… or you can apply these presets to take shortcuts to faster photo editing.
In this bonus, we’re providing you with 40 presets, and a video tutorial to get you started with photo editing.

90 Day Money-Back Guarantee

Our 250,000+ customers love our courses and we're confident you'll love this too. So confident, in fact, that we're offering these two industry-leading guarantees.
Guarantee #1: If you don't think "Epic Landscape Editing" is the best money you've spent on your landscape editing... send me an email. I'll provide you with a full refund – no questions asked.
Guarantee #2: If you DO what's recommended, and your results aren't great, I'll refund double your money. All I ask is that you give it an honest effort. How's that for fair?
Here's The Amazing Deal We've Put Together
We’ve created a video course on landscape editing that works for any landscape photographer.
And to make the method as easy as possible, the video course contains projects that show you how to achieve stunning results even in ordinary conditions.
And although the value far exceeds $1,000.00, we’re offering this for a very limited introductory price.
So if you’re interested in experimenting with (or advancing) your landscape editing… and you’d like to have a guide filmed by a photographer who’s a pioneer in the field…
Get Epic Landscape Editing and start taking and post-processing mesmerizing landscape photos in a few hours.
Epic Landscape Editing
An Easy Way to Intuitively Edit Your Landscape Photos
The entire course contains:
Value
1️⃣
Cloudy Conditions (4 Videos; 38 minutes)
$149.00
2️⃣
Sunny Skies (4 Videos; 32 minutes)
$149.00
3️⃣
Foggy Conditions (4 Videos; 32 minutes)
$149.00
4️⃣
Sunrise & Sunset (4 Videos; 29 minutes)
$149.00
5️⃣
Golden Hour (4 Videos; 30 minutes)
$149.00
6️⃣
Layered Landscapes (4 Videos; 29 minutes)
$149.00
7️⃣
Fall Fairytales (4 Videos; 20 minutes)
$149.00
8️⃣
Long Exposure Photography (4 Videos; 32 minutes)
$149.00
9️⃣
Milky Way Blends (4 Videos; 33 minutes)
$149.00
🔟
RAW File for Every Project
$99.00
---------------
Total Value:
$1,440.00
Plus... you're also getting these powerful bonuses:
🖼️
60-Minute Lightroom Starter Course
$199.00
🖼️
The Creative Compositions Manual
$99.00
🖼️
Sky Replacement Gallery (6 Raw Files)
$59.00
🖼️
Lightroom Presets for Landscapes (40 Presets)
$99.00
---------------
Total Value:
$456.00
A combined value of $1,896.00
But you won't be paying $1,896.00 today. You won't even be paying $299.00. Or even half of that.
It's Yours Today For Just $99 🔥
But hurry! Only the next 500 copies are discounted!
Save an amazing $1,857.00 before the countdown ends:
But There's A Catch
(Please Read This Carefully)
When we release a new product, we always discount the price for the first 500 people. But it’s 500 people only.
For that reason, time is very much “Of the Essence”… I can’t stress the time-sensitiveness of this offer enough.
Not only will the 500 courses go quickly, but at that point, the $1,857.00 discount will expire. And I’m taking the bonuses away too.
Why? The reduced price is to celebrate the launch of the new course. The value of the course is far higher. It doesn’t make long-term sense to sell it for such a low price.
Zach is the Industry Leader... Don't Miss Out!
Zach filmed this course under my brief:
“Show us how to process vibrant landscape photos with tips that any photography enthusiast could follow.”
If you follow his advice, you can avoid wasting time and disappointing results. And start breathing new life into old and new landscape photos.
So it’s decision time: You can either continue editing photos the way you’ve always done it… Or you can take Zach’s advice and rapidly improve them with his easy editing steps.
This simple $99 course is the only thing standing between you and the stunning photos you see throughout this page.
Zach’s methods have worked for other people like you, and it’s 200% guaranteed so you have nothing to lose.
It’s a no-brainer.
Yours Truly,
Josh Dunlop
Founder, Expert Photography
P.S. – You’re getting everything you need to become amazing at landscape editing, AND you’re getting the 60-Minute Lightroom Starter Course, The Creative Compositions Manual, the Sky Replacement Gallery, and the Lightroom Presets for Landscapes bonuses for FREE. But remember – 500 is the magic number.